So I have been working on cleaning up the MacBook hard drive, doing things with the movies instead of just storing them waiting until later, so that I can delete them from the internal drive. Like I made a DVD of Roark 2007, that includes everything besides the truck races on the driveway pages on my old blog site. I still have a mega huge job to do.
As far as the G4 iMac, there was nothing wrong with it at all. I just didn't understand that when one user is logged in, say Marae, that it doesn't list how much drive space the other user's files are taking up. Everything is now stored on the external drive so if I need to delete some movies or something from the internal drive, it's cool.
The G4 iMac is now Marae's and the G3 Blueberry is going to be the one Roark gets to use when he visits instead of the old old Performa. I need to load it up with the correct software. Actually Robert plans to install the drive out of his old, broken down G3 which we already loaded with tons of educational software a long long time ago.
Anybody want a Performa 6360 once I am sure I don't want it any more?
[added March 1, 2008] Yesterday I took the Performa to a friend who has an even older Performa with a monitor that no longer works.

This is what it was all about. But what else was happening?
Thursday, January 31, 2008
Tuesday, January 29, 2008
Snowy Day
I got to go to work at CTB yesterday, and was supposed to work for several days. I asked for today off though so I could do the tutoring thing after school that I've been doing the last few Tuesdays. What I wasn't counting on was being blessed by the Lord with a snowy day here in the foothills.
8:41 AM
8:44 AM
9:41 AM
9:44 AM
9:44 AM
10:31 AM
8:41 AM
8:44 AM
9:41 AM
9:44 AM
9:44 AM
10:31 AM
Thursday, January 24, 2008
Computers Computers Everywhere
My main computer is my MacBook. It has like 112 GB of hard drive space and about 90% of it is used up, thanks to all the photos and videos I took in 2007 and so far in 2008. My desktop computer is a G4 iMac, but I hardly ever use it. It has like 75 GB of space and even though when you add up all the folder sizes you get less than 20 GB used, it reports that there is less than 20 GB of free space. Argh. Marae uses a Blueberry G3 iMac. It has like 10 GB of hard drive space which is 70% used. I also have an old Performa that has mostly educational games on it. It is in storage right now so I'm not sure how big the drive is, but it can't be big.
I am thinking that I should upgrade Marae to the G4 iMac, and put the educational games on the G3 Blueberry iMac, and get rid of the Performa. One less computer sounds good to me right now. It would also free up some desk space to set up an old Apple // computer to see if it still works and if the software still works after being stored away for years. But before I do any of this I need to fix, if possible, the G4 iMac free space problem. And before I do that, I need to make some space on my MacBook in order to move files from the G4 iMac.
I am thinking that I should upgrade Marae to the G4 iMac, and put the educational games on the G3 Blueberry iMac, and get rid of the Performa. One less computer sounds good to me right now. It would also free up some desk space to set up an old Apple // computer to see if it still works and if the software still works after being stored away for years. But before I do any of this I need to fix, if possible, the G4 iMac free space problem. And before I do that, I need to make some space on my MacBook in order to move files from the G4 iMac.
Monday, January 21, 2008
Green Roo... no—Library!
Today Marae and I worked at filling the shelves in the library. She unpacked the tubs, organized, sorted, shelved. I packed them in for her and packed out the ones we don't want any more. Here are some videos showing the library.
(4/12/2013: We still call it the green room. =\ )
Saturday, January 19, 2008
Baseboard Day 1
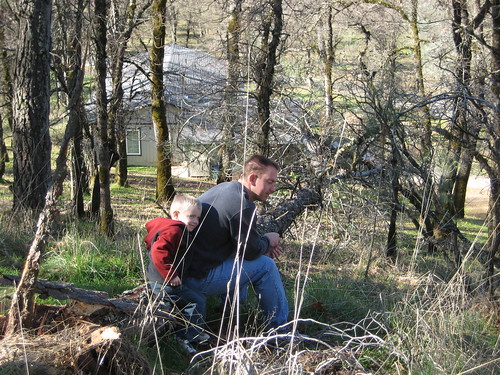
While we were waiting for the girls to get back with the baseboard we hiked up the hill to survey the storm damage.
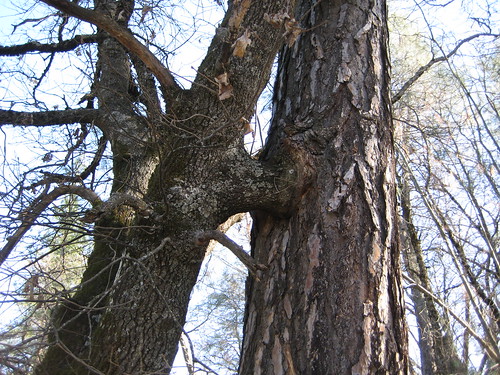
Up the hill there is an oak tree that has a branch growing into a pine tree. Here are a couple views.
If you have been following the story, you know how packed the shed was. Here is what it looks like now. Still crowded, but the three big bookshelves are now in the green room.
Finally a look at the green room.
Thursday, January 17, 2008
Carpet Done
The carpet guys got here around 9:00 or so this morning and left at around 1:00 this afternoon. Maybe a little earlier.
And here is my first response when I walked out back.
And finally a walk-through when the carpet guys were done and gone.
And here is my first response when I walked out back.
And finally a walk-through when the carpet guys were done and gone.
Penned Out Penned In
Penned Out
Breann wants to know if I can use my cool little photo printer to make some copies that Janet can bring to her. Hahahahaha hohoho hehehehehe. She figured I probably kept in on a shelf in the closet. Not this time. It is in the bottom of a tub buried about 6 or 8 feet deep in the shed.
Penned In
The carpet guys are here. The first thing they did was move the couch to the kitchen. Then they carried the dining table to the end of the hall, then the corner hutch down the hall, then...
Wednesday, January 16, 2008
Get to Know the Corners
[May 7, 2008: I use part of this process to finish up the cube now, but I do not get all the edges this way.] This is Part 3 in a series of posts to help you get to know the Rubik's Cube. If you really want to read all this, do yourself a favor and get a 3x3x3 Rubik's Cube first. Last time I checked they have them at Walmart, Target, and Kmart for less than $10. At Walmart in Oroville just before Christmas I saw them on sale for $5. Start with Part 1, which is the Vocabulary section. Study the actual cube as you read through it. Then do Part 2, which is the Edges section. Then when you are able to consistently get the edges come back to this section.
If the Edges get messed up while doing the Corners, you goofed. Fix the Edges and try again.
Conjugation A set of preliminary moves is done before the Corner Piece Series, then after the Series, these moves are undone. That way the Corner Piece Series can be applied to any three corners anywhere on the cube. Sometimes I get lost and can’t remember how to undo the preliminary moves. I end up having to fix edges. The better I get to know the Corners, though, the less this happens.
Corner Pieces Use the Corner Piece Series to move all but three corners Home. Rarely can three be moved into place at once. Don’t even think about it. Once in a great while you can move two pieces Home at once. Usually you can get one. Sometimes some pieces can not be moved Home without conjugation, or without moving them somewhere else first. At first, don’t worry so much about the Corners that are difficult. Work with the easy ones. Sometimes a Corner is in the right place, but not twisted (oriented) correctly. Move it away while moving another piece to its place. Then move the twisted one back into place in the correct orientation. I kept getting lost as I tried to take Corners Home at first. Make sure you turn the Cube so the trio of Corners that you are moving are situated with one on the Front of the Upper Layer and two on the Back of the Upper Layer. After you get good at putting one corner Home at a time, if you want, you can use conjugation to put two Home at once.
Once you are down to three remaining corners, use the Corner Piece Series one time with conjugation if necessary—and it usually is necessary—to place the last three corners in their Home Positions. Find a Corner Piece which may be moved along a cube edge and into place. If none can be found create one. Note the face color (of the second corner piece) which will come to the top face of the cube in a target position during a Corner Piece Series. Locate the third corner piece in the cube face of this same color and note the color of the third corner piece face which is in that cube face. Bring the third corner piece to the top of the cube, by various face turns, such that that color is in the top face of the cube. Perform the Corner Piece Series so that the target color of the second corner piece replaces this color. Reverse the preliminary face turns indicated above.
Get to Know the Edges (ignore the corners for now)
[May 7, 2008: I no longer use the following method of getting the edges, but am leaving it here in case I ever want to refer to it in the future.] This is Part 2 in a series of posts to help you get to know the Rubik's Cube. If you really want to read all this, do yourself a favor and get a 3x3x3 Rubik's Cube first. Last time I checked they have them at Walmart, Target, and Kmart for less than $10. At Walmart in Oroville just before Christmas I saw them on sale for $5. Start with Part 1, which is the Vocabulary section. Study the actual cube as you read through it. Then do this section, which is the Edges section. Then when you are able to consistently get the edges go on to the section on Corners.
Edge/Center Pairs Pair up an edge with its matching center. Do it for various edges getting a feel for what is involved in various scenarios. When you get good at it, pair up four edges with a common color to their common center. Do so in such a way that you end up with a single-color cross on one side made up of the center and four edges. Do this for each of the colors, focusing on only one color at a time. If it hasn’t occurred to you yet, the next step is to solve the cross in such a way that each piece is in its Home Position. In fact from now on when I refer to a cross it means with each piece in its Home Position.
Middle Edges Make a cross on one layer. With the cross facing down, move any three of the Middle Layer Edges to their Home Positions, leaving one Last Layer Edge Piece in the Middle Layer. You will have to temporarily move one piece of the cross at a time out of position, but it will go back into position as you put the Middle Edge pieces into place. If the Middle Edge piece is in the U layer it takes only 3 or 4 moves to put it Home. If the Middle Edge piece is in the Middle Layer but in the wrong place or in the right place but flipped, then it could take 6 moves—3 to move it up to the Upper Layer and 3 to move it Home. If all four Middle Layer Edges are in place, move one of them to the LL, and replace it with a LL Edge Piece. After you figure out how to take a Middle Edge Piece Home from any of the possible places it may be, scramble the cube, get a Cross, and take 3 Middle Edge Pieces Home, leaving one Last Layer Edge Piece in the Middle Layer.
3 Last Layer Edges Make sure one of the Last Layer Edge Pieces is in the fourth Middle Edge spot. Hold the cube so the unsolved Middle Edge is in front with the Last Layer color facing front. The edge piece is on two layers: the Front Layer and either the Left Layer or the Right Layer. Spin the Upper Layer—I could have said “Spin the top” but the short version is “U” for Upper—so that the last middle edge piece lines up on the same side—either L or R—as the unsolved middle edge spot. Spin the layer that contains these two edges away from you. If it is on the right, do R; if it is on the left, do –L. Spin U so that an edge piece that does not have the Last Layer color face up replaces the edge piece you just moved up. Spin the R or L side back down so that the First Layer Cross is restored. Continue this process until there are 3 Last Layer edges with the Upper Layer color face up. My suggestion is to scramble the cube again and get back to this point several times before going on.
Finish Edges You now have 3 edges in the Upper Layer that belong in the Upper Layer. But how many can be positioned correctly at once by spinning the Upper Layer?
If only 1 at a time can be placed correctly by spinning the Upper Layer, use the Edge Piece Series on three of the LL Edge Pieces so that there are still three face up, but now two of them are in, or can be spun to, their Home Positions. Proceed to the next paragraph.
If 2 LL Edge Pieces are Home, or you can spin U to take two Home then hold the cube so the LL Edge Piece that is still in the Middle Layer is at the front of the cube with the Upper face color facing front. Spin the top so the LL Edge Piece that is not correct in relation to the other two lines up on the same side—either L or R—as the piece in the Middle Layer that needs to replace it. Either use R or –L, depending on whether it is on the Right or Left, to spin the Edge Piece up to the top. Spin U so that the last of the Middle Layer Edge Pieces spins down into place when you spin the side back down toward you. Spin U if necessary so all the LL Edges are in their Home Positions. All of the edges are now in place! Go to Step 3.
If 3 LL Edge Pieces can be placed in their Home Positions then hold the cube so the LL edge piece that is still in the Middle Layer is at the front of the cube with the Upper face color facing front. Spin U so the last Middle Layer edge piece is at the front. If the LL Piece that is still in the Middle Layer is on the Right, do: R U –R U R U –R then spin U so the LL Edges are Home. If the LL Piece that is still in the Middle Layer is on the Left, do: –L –U L –U –L –U L then spin U so the LL Edges are Home. Once you do this a few times and understand what is happening, you won’t think in terms of R’s, L’s, and U’s at all. You won’t think about clockwise and counterclockwise. It is a simple sequence, but was easier to explain as face turns, than in words.
You know the drill—scramble the cube and get all the Edges Home. Do it over and over again until you can do it consistently without looking at any notes. Now you know the Edges, and are ready to get better acquainted with the Corners.
Lesson 1—Getting to Know the Rubik's Cube—Vocabulary
Center There are 6 centers. They each have one face. They determine the color of a side.
Edge There are 12 edges. They each have two faces. On a solved cube each edge will match up with 2 centers. An edge is flipped if it is between the correct centers, but oriented opposite to what it should be. For example, red to white and white to red, instead of red to red and white to white. Getting the 4 edges of one side all in their Home Positions is commonly called getting a Cross.
Corner There are 8 corners. They each have three faces. On a solved cube each corner will match up with 3 centers. A corner is twisted if it is in the correct place, but its 3 faces do not match the side they are on.
Side, Face, Layer There are 6 of them. On a solved cube each side will be a solid color. When solving a cube some methods rely heavily on naming the layers:
U = Upper Layer D = Down Layer F = Front Layer
L = Left Layer R = Right Layer B = Back Layer
Home Position The place any given piece lives when the cube is solved. Being in the Home Position means it is oriented correctly as well as in the right place.
Clockwise In relation to someone looking at the face. R means to turn the Right Layer clockwise;
–R means to turn it counterclockwise. R´ (R prime) is a more common way to indicate –R.
First Layer The first layer worked on. Some methods solve a whole layer first; some solve all but one corner; some solve only the edges; some solve only corners; some use a different approach.
Middle Layer The four edges that are adjacent to the First Layer Corners.
Last Layer The last layer solved. Even methods that solve corners last, have first, middle, and last layers when it comes to the edges. LL = Last Layer.
Move Twist a layer either a quarter or half turn. U is a move of the Upper Layer Clockwise 90˚. R2 is a move of the Right Layer 180˚. A move can be clockwise or counterclockwise.
Corner Piece Series
U R –U –L U –R –U L cycles 3 top corners counterclockwise. The Front Right Corner doesn’t move. Cubes twist clockwise. The Front Left Corner moves diagonally from the front to the back. No edges are affected.
–U –L U R –U L U –R cycles 3 top corners clockwise. The Front Left Corner doesn’t move. Cubes twist counterclockwise. The Front Right Corner moves diagonally from the front to the back. No edges are affected.
The Carpet Installation Begins
Here's how things looked after they moved all the furniture.
I set up shop in the Green Room since it was my only option at the time.
The following video shows the new carpet. They got the day's carpet done, moved the beds and furniture back, stored their stuff in the green room, and left by 2:00 this afternoon.
Monday, January 14, 2008
Other Video Options
OK, so I tried the Yahoo! Video thing. The thing I don't like about it is the search link it puts on my video after it plays it. So now I am going to just upload a video directly to this blog. This is another video I took during the dry-out process. This video was taken on January 4.
Recap of Water Woes
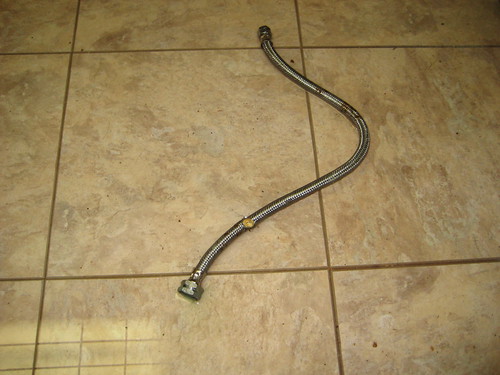 Here are a couple pictures of the hot water flex tube that ruptured under our kitchen sink while we were in RB for Christmas. We got home on December 29.
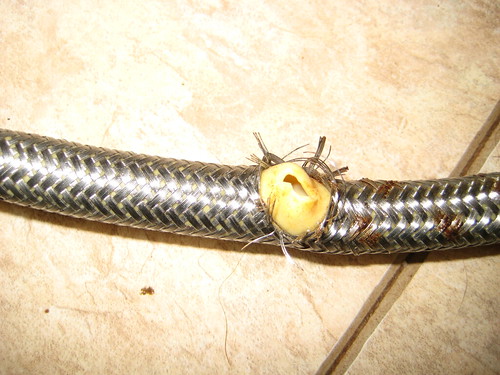
On January 5, we were down to one dehumidifier and one blower. Not surprisingly, the only remaining dampness was under the kitchen sink, the source of the leak.
On January 7, ServiceMaster Clean came and declared the moisture totally under control and removed the drying equipment altogether. That was a week ago. This last week we have been busy preparing for the installation of the carpet that is replacing all the carpet that was ruined in the leakage.
If you want to view any of these photos larger, go to my Flickr page.
Subscribe to:
Posts (Atom)